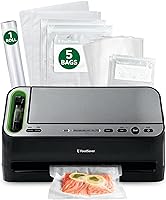
How Do Vacuum Sealer Rolls Work? Cutting Your Own Bags
Vacuum sealer rolls are textured plastic tubes that you cut to length and seal at one end before filling. After you add food, the machine removes air through the textured channels and heat-seals the open end.
On this page (7 sections)
Vacuum sealer rolls are textured plastic tubes that you cut to length and seal at one end before filling. After you add food, the machine draws air through the textured channels and heat-seals the open end.
That gives you control over bag length. You can make a longer bag for a large cut or a shorter one for a small portion, while leaving the flat area needed for a reliable seal.
For the basic pump-and-seal process, see how vacuum sealers work. This guide focuses on turning a roll into a bag and choosing a length that fits your food and machine.
How do vacuum sealer rolls work?
A roll becomes a bag when you cut a piece, seal one end, fill it, and seal the other end after vacuuming. Most countertop models pull air through the textured side of the bag before their heat strip closes the open edge.
The texture forms small channels between the bag layers. Those paths help air move toward the machine's vacuum area while the bag is held in place.
A roll is already joined along its long edges. Cutting across it creates the open ends, so each piece needs a heat seal at both ends to become a closed food-storage bag.
Rolls are made for compatible machines. Check the manual for the bag width and surface type the machine accepts; countertop vacuum sealers commonly use textured bags.
How do you cut and seal a bag from a roll?
Cut the roll to the length you need, seal one end, then fill and vacuum-seal the other end. Keep the open edge flat and clean so the machine can close it evenly.
- Measure enough roll to cover the food with room for sealing.
- Cut straight across the roll.
- Place one open edge in the machine and make the first seal.
- Add food, keeping crumbs and liquid away from the top edge.
- Place the remaining open edge in the machine and run the vacuum-and-seal cycle.
Follow your sealer's instructions for positioning the bag. Some machines need the edge placed in a specific area, and the correct method can vary by model.
Don't cut a bag so short that the food crowds the seal. If you want a broader look at how bag style affects sealing, see our guide to the best quality vacuum sealer bags.
How much space should you leave above the food?
Leave a clear, flat section above the food for the machine to vacuum and seal. Your manual may specify a minimum amount of material beyond the food, so use that guidance.
Keep the sealing area free of grease, crumbs, and moisture. If food is near the opening, liquid or bits can interfere with the heat seal.
A little extra room also makes it easier to open the bag later. You can trim a clean edge and seal it again if the bag is still long enough.
What if the roll is too wide for your sealer?
Use a roll width that fits your machine's bag area. A roll that extends beyond the sealing surface can be difficult to position and may not seal as intended.
Measure the usable width in your machine's manual or check its stated bag-width limit. Don't assume a roll fits just because it is sold for vacuum sealers.
Are rolls better than pre-cut vacuum bags?
Rolls are useful when you need different bag lengths, while pre-cut bags save the measuring and first-end sealing step. The better choice depends on whether flexible sizing or faster prep matters more to you.
With a roll, you choose the length for each item. That can help avoid a very long bag for a small portion, but you must cut and seal one end before filling.
Pre-cut bags are ready to fill, though the available sizes may not suit every food. If you store the same portion sizes often, having matching bags ready can simplify prep.
The [FoodSaver Custom Length Rolls Multipack] includes 8 in and 11 in rolls in several lengths, giving you two width options in one set.
Choose rolls if your bag lengths change often. Choose pre-cut bags if you want to skip the first seal and your usual foods fit the sizes you keep on hand.
For a separate comparison of sealing methods, read vacuum sealer vs. heat sealer. A heat sealer closes a bag but doesn't remove air the way a vacuum sealer does.
Which roll features can make bag prep easier?
A built-in cutter and storage compartment can make it easier to measure and cut bags at the machine. If your sealer has neither, scissors and a clean place to store the roll can do the job.
The Bonsenkitchen 11-Inch Roll with Cutter Box comes with a built-in cutter and a dust-proof storage box. Its roll is 11 in wide and 150 ft long.
This may suit you if you routinely make different bag lengths and want the roll kept in its own holder. Check that 11 in is within your sealer's supported width.
The Potane Precision Pro Vacuum Sealer has built-in bag storage and a cutter bar, and it includes 11 in and 8 in rolls. That can be useful if you want the machine to keep the roll and cutting tool together.
Gasbye's 95kPa Precision Vacuum Sealer also has built-in roll storage and a cutter. It comes with two 11 in by 10 ft rolls and five pre-cut quart bags.
These are machine options for readers who want roll storage and cutting at the sealer. If you already own a compatible machine, a roll holder or scissors may be all you need.
What foods work well in custom cut bags?
Custom lengths work for foods that fit inside the bag with enough clear material left for sealing. Use a shorter piece for small portions and a longer piece when the food needs more room.
For dry foods, make sure the bag is clean inside near the seal. For moist foods, keep liquid from reaching the open edge; follow the machine maker's instructions for wet ingredients.
Large or sharp items need enough room to avoid stressing the bag. Check that the food doesn't push against the side seams or poke through the material.
For flour and other pantry staples, see how to vacuum-seal flour. For Mason jars, use a jar attachment and follow our guide to vacuum-sealing Mason jars, since jars use a different setup than roll bags.
Why might a vacuum sealer roll bag fail to seal?
A bag may fail to seal if the edge is folded, wet, dirty, or outside the machine's sealing area. Reposition the bag with a flat, clean edge and follow the sealer's manual.
Check that you used a compatible textured bag and that its width fits the machine. A smooth bag may not provide the air channels some countertop sealers need.
If the machine won't pull air from a correctly placed bag, use these vacuum sealer troubleshooting steps. A problem with the machine's vacuum process is different from a bad edge seal.
How do you choose the right roll length?
Cut the bag long enough to hold the food with clear material left for sealing, but avoid adding length you don't need. Make a little extra room if you may want to trim and reseal the bag later.
Measure the food's length and thickness, then allow space at the top and around bulky edges. Use the machine's guidance for minimum sealing space and bag width.
For recurring portions, measure one typical item and note the length that leaves a clean sealing area. You can then prepare a few bags at that size without measuring every time.
The simple rule is to use rolls when bag size varies and pre-cut bags when your portions fit a standard size. Choose a cutter box if it makes frequent cutting easier, and choose a machine with built-in storage when keeping the roll beside the sealer helps your routine.
Frequently asked questions
How do vacuum sealer rolls work?
A roll is a textured plastic tube that you cut to the length you need. Seal one end, add food, then use a compatible vacuum sealer to draw air through the texture and heat-seal the open end.
Leave enough empty material at the top for a clean seal.
Do you seal both ends of a vacuum sealer roll?
Yes. First, seal one end of the cut piece to make a bag.
After filling it, remove air with the vacuum sealer and heat-seal the remaining open end.
Keep food and moisture away from the sealing area so the seal can close evenly.
How much extra room should I leave in a vacuum sealer bag?
Leave several inches between the food and the open edge, and follow your sealer's manual for its minimum sealing space. Extra room gives the machine a clear, flat area to seal and leaves space to trim or reseal the bag later.
Can you use any roll with any vacuum sealer?
No. Check the sealer's manual for the required bag width and surface texture.
Many countertop sealers need embossed or textured bags that let air move toward the vacuum channel, and an oversized roll may not fit the machine.